How to Import a Script in Vision
Last updated
Sep 20, 2025
This article shows you how to import a PDF script into Vision and use the automatic scene detection and breakdown features. Working with a storyboard as foundation? Then check out this article here.
Before You Start
You need a PDF script file in standard script format
You will need to have enough script import credits (1 script page = 1 import credit)
Language: English works best for now, additional languages are being added
Time needed: About 4-7 minutes (including 2 minutes for processing)
Step 1: Start the Import Process
Open your project in Vision
Click Story in the top left navigation bar. Make sure you are in Script View.
Click Import script (you'll see this if no script has been imported yet, otherwise open the Adjust Menu and click on Re-import script)
Either click to select your PDF script file OR drag and drop it into the upload area
Vision will show you the credit cost before starting (1 page = 1 credit)
Step 2: Wait for Processing
Vision will process your script for up to 2 minutes
You can leave this page - Vision will notify you when it's ready
When processing is complete, you'll see a system message saying "Finalize your script import"
Click the message to continue
Step 3: Review and Edit Your Scenes
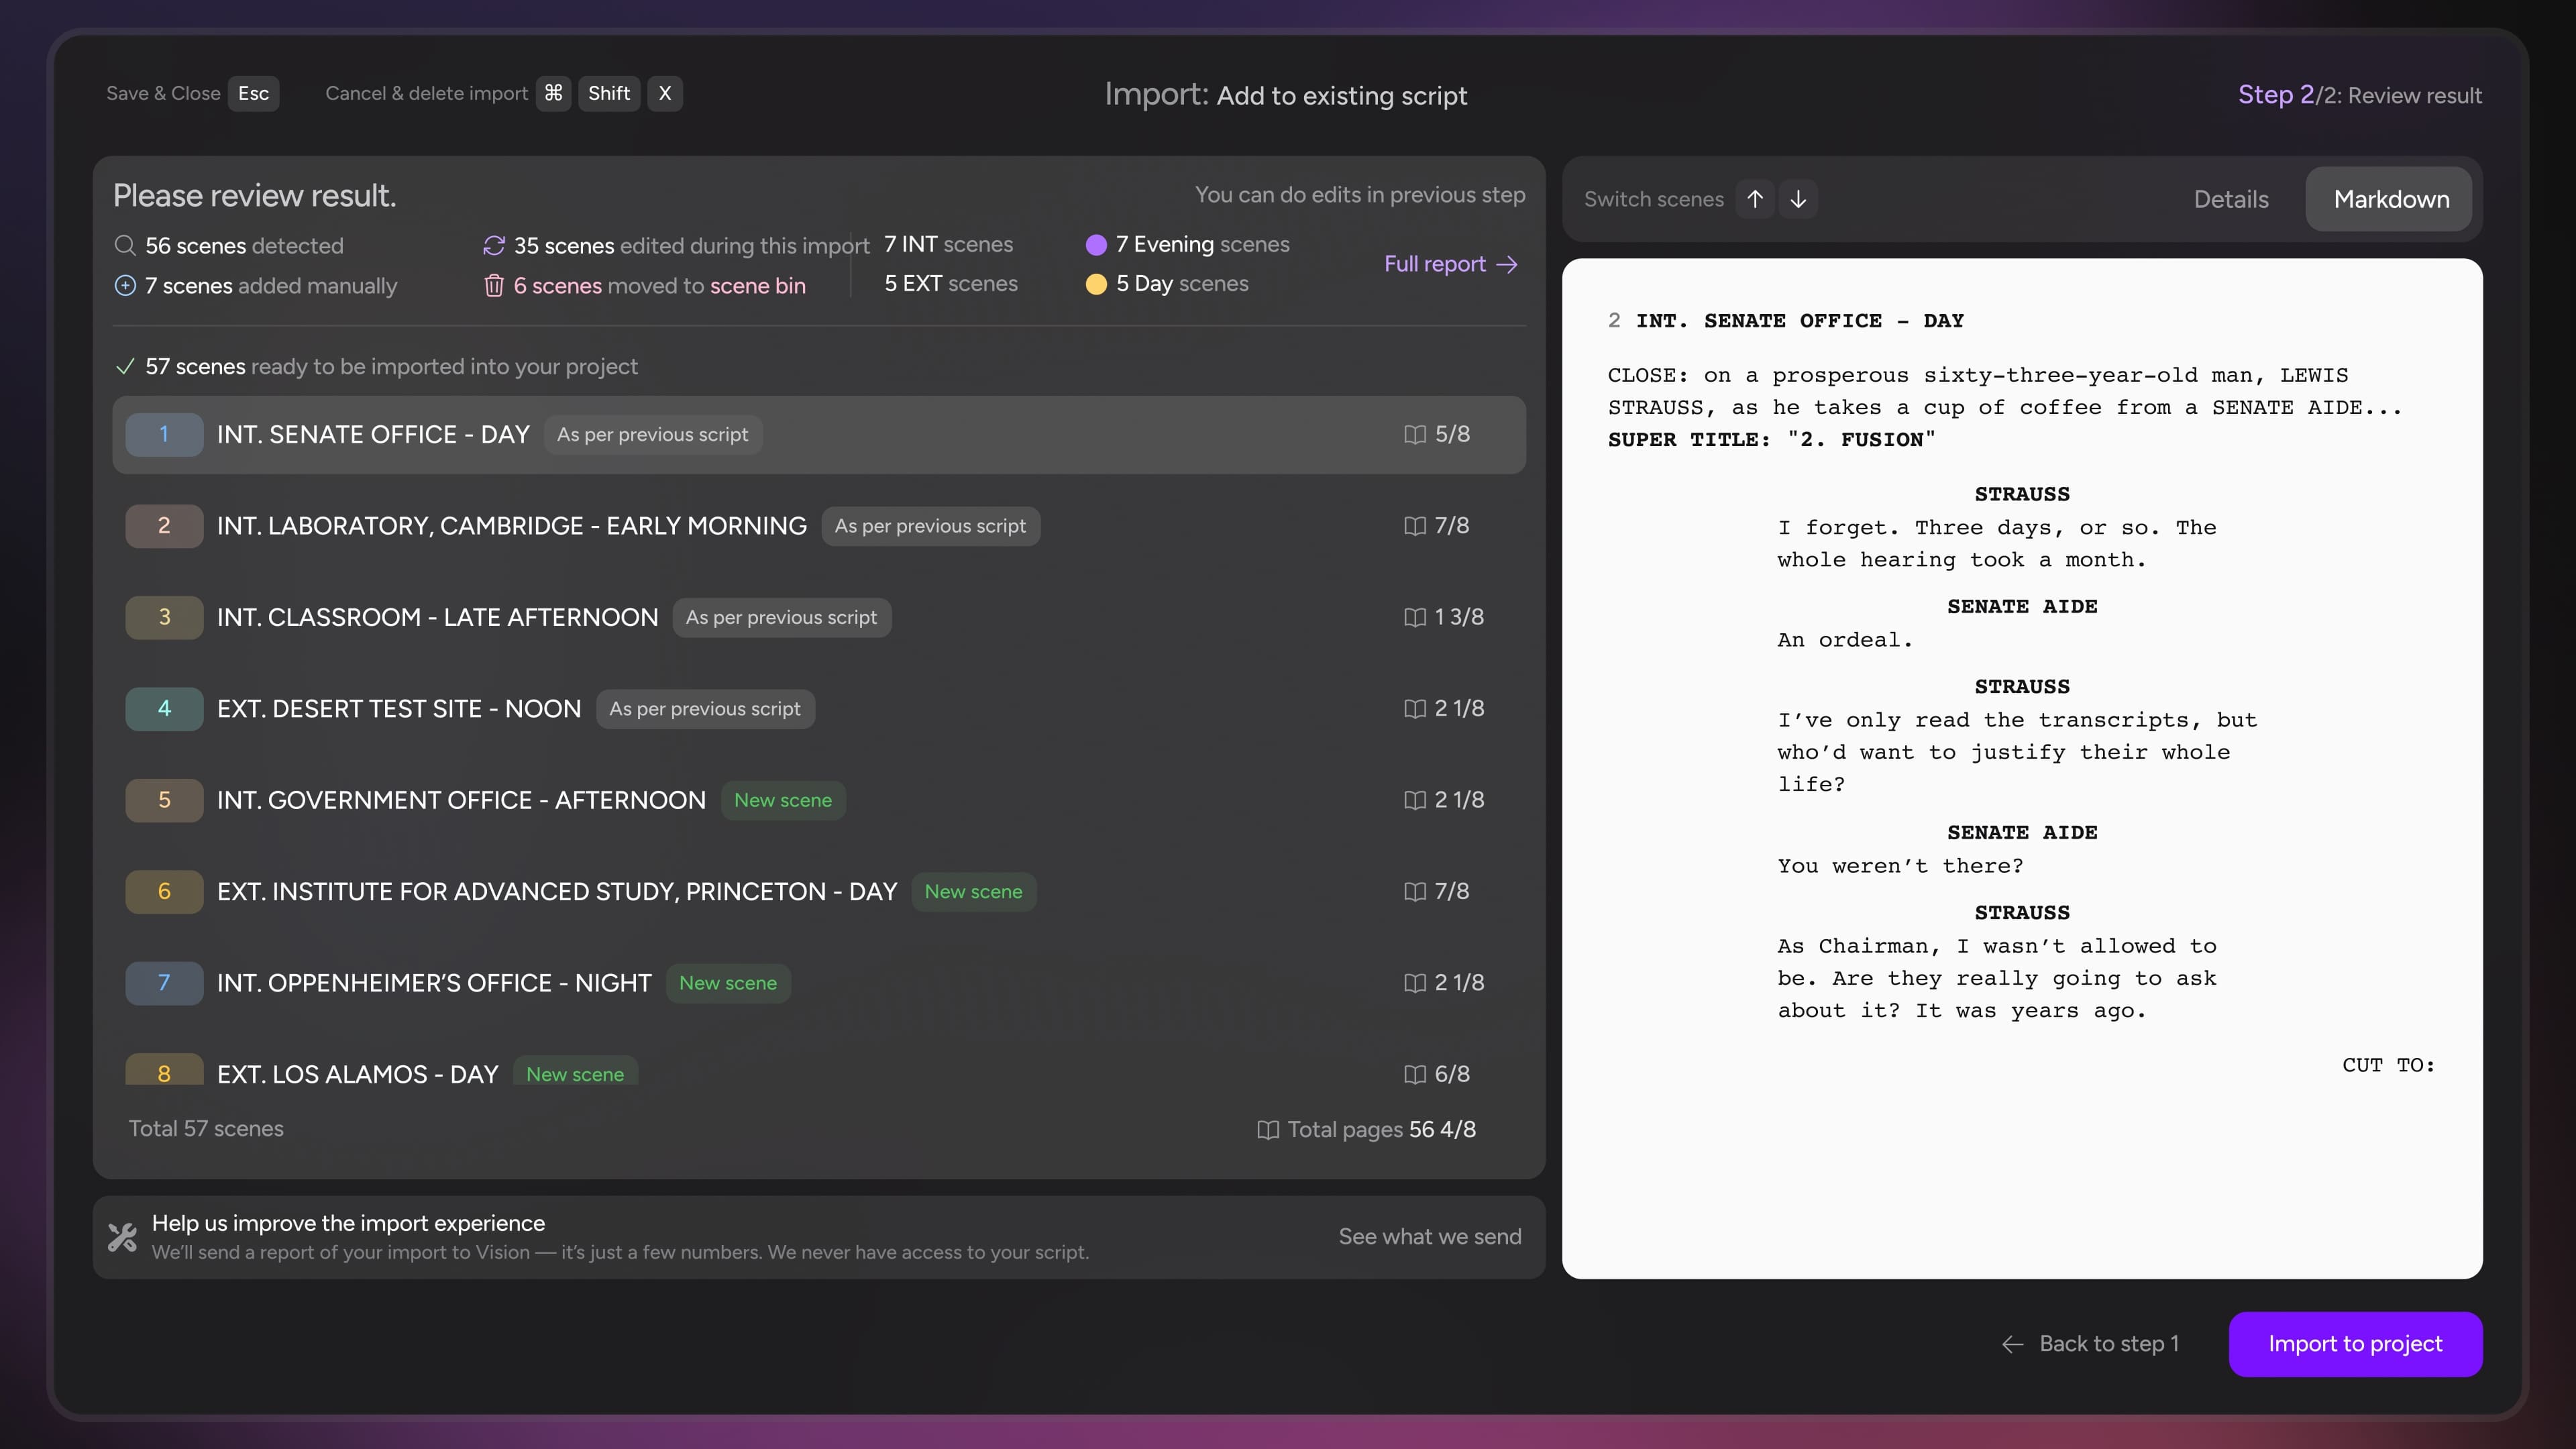
You'll now see the import modal with two panels: Left panel: All detected scenes Right panel: Scene details and synopsis
Here's what you can do:
Edit scene summaries: Click on any automatically generated synopsis to modify it
Add scenes: Use the three dots menu to manually add scenes Vision missed
Delete scenes: Use the three dots menu to remove false detections (scenes go to the bin)
Reorder scenes: Drag scenes up or down if the numbering isn't correct
Step 4: Final Review and Import
Click Review Results to see a full import report
This shows your complete script breakdown
Includes details like number of day/night scenes
Double-check all scenes and details
Click Finish Import when everything looks correct and to add the import to your project.
After Import
Your scenes will appear in Story -> Script View, ready for production planning.
Tips
Need a break? Press ESC to close the import flow and return later - your progress is saved
File format: Only PDF scripts are supported
Scene detection: Vision's AI is smart, but always review the detected scenes for accuracy
Troubleshooting
Problem: Import is taking longer than 2 minutes Solution: Check your internet connection and try refreshing the page. If the issue persists, contact support.
Problem: No scenes are detected during import Solution: Re-run the import and make sure your script is in a standard script format. If the issue continues, contact support.
Problem: Not enough import credits Solution: You'll be prompted before the import starts. You can either upgrade to a higher plan with more credits or choose to partially import your script.
Next step: Learn how to break down your imported script into shooting schedules